Master SVG to PNG Export for Flawlessly Sharp Web Images
Is there anything more frustrating than designing a beautiful, sharp logo only to see it appear fuzzy and pixelated on your website? This common problem often stems from using the wrong image format or an improper export process. While SVGs (Scalable Vector Graphics) are the gold standard for creating infinitely scalable graphics like logos and icons, they aren't universally supported. That's where PNGs (Portable Network Graphics) come in.
Mastering the art of converting SVG to PNG is a crucial skill for any web developer, designer, or content creator. It’s the secret to ensuring your graphics remain crisp and professional across every platform, from email clients and social media to older browsers. This guide will walk you through everything you need to know, from the fundamental differences between vectors and rasters to step-by-step export tutorials for popular software, ensuring your web visuals always look their best.
Understanding the Core Concepts: Vector vs. Raster
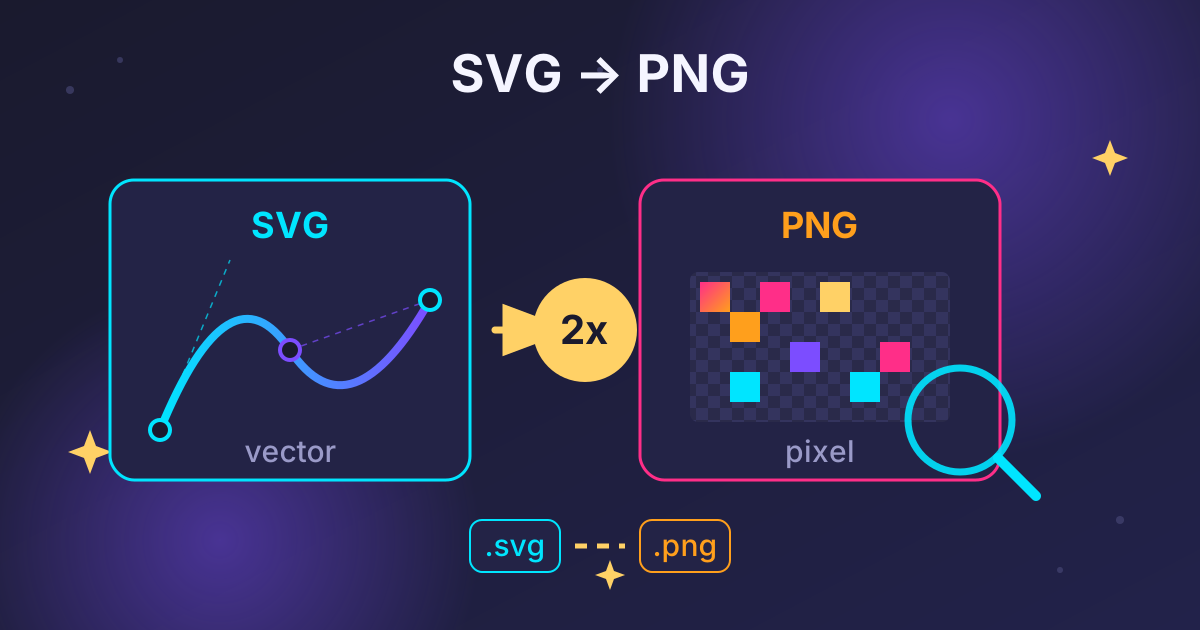
Before we dive into the 'how,' it's essential to understand the 'what.' The difference between SVG and PNG lies in their fundamental structure: one is based on mathematical formulas (vector), and the other is based on pixels (raster).
What is an SVG (Scalable Vector Graphic)?
Think of an SVG as a set of instructions or a recipe. Instead of storing information about every single pixel, an SVG file contains XML code that describes shapes, lines, curves, and colors. For example, it might say, "Draw a circle with a 50-pixel radius, a blue fill, and a 2-pixel black stroke at these coordinates." Because it's just a set of instructions, you can scale it to any size—from a tiny favicon to a massive billboard—and the computer will simply re-render the instructions, resulting in a perfectly sharp image every single time. There is zero quality loss.
What is a PNG (Portable Network Graphic)?
A PNG, on the other hand, is a raster image. Think of it as a grid of tiny colored squares, called pixels. A 500x500 pixel image is a grid of 250,000 individual squares. This format is excellent for detailed images like photographs. However, its reliance on a fixed number of pixels is its biggest weakness. If you try to enlarge a PNG, the computer has to guess what colors to fill the new pixels with, leading to blurriness, jagged edges, and a significant loss of quality.
SVG vs. PNG: A Quick Comparison
To make it even clearer, here's a side-by-side comparison, perfect for understanding which format to use and when:
| Feature | SVG (Vector) | PNG (Raster) |
|---|---|---|
| Basis | Mathematical Equations & Paths | Grid of Pixels |
| Scalability | Infinite, with no quality loss | Loses quality when scaled up |
| File Size | Typically smaller for simple graphics | Can be large, depends on dimensions & complexity |
| Best For | Logos, icons, simple illustrations, charts | Photographs, complex images, web graphics |
| Transparency | Yes (Full Alpha Channel) | Yes (Full Alpha Channel) |
| Editability | Easily edit shapes, colors, and code | Requires pixel-level editing in a photo editor |
| SEO & Accessibility | Text within SVGs is crawlable and accessible | Requires alt text for SEO and accessibility |
Why Convert SVG to PNG? Key Use Cases
If SVGs are so flexible, why do we need to convert them to PNGs at all? The answer comes down to one word: compatibility. While modern web browsers have excellent SVG support, the digital world is much bigger than just the latest version of Chrome or Firefox.
Here are the primary reasons you'll need a trusty PNG version of your vector graphic:
- Email Clients: Most email marketing platforms and clients have limited or no support for SVG files. To ensure your logo or icons render correctly for all subscribers, a PNG is the safest bet.
- Social Media Platforms: When you set Open Graph images (the preview images that appear when a link is shared), platforms like Facebook, Twitter, and LinkedIn require raster formats like PNG or JPG.
- Older Browsers: While rapidly dwindling, some users may still be on older browsers that lack full SVG support.
- Content Management Systems (CMS): For security reasons, some CMS platforms like WordPress (by default) restrict the upload of SVG files. A PNG is a universally accepted alternative.
- Software & App Compatibility: Many applications, from presentation software to word processors, work more reliably with PNGs than SVGs.
The Conversion Process: A Step-by-Step Guide
Converting an SVG to a high-quality PNG can be done in several ways, from quick online tools to professional design software. The method you choose depends on your needs for control, privacy, and convenience.
Method 1: Using Online Converters
Online tools are the fastest way to convert a single file without installing any software. They are perfect for quick, one-off tasks.
Pros:
- Extremely fast and convenient.
- No software installation required.
- Accessible from any device.
Cons:
- Less control over export settings (resolution, compression).
- Potential privacy concerns as you're uploading your files to a third-party server.
At Practical Web Tools, we prioritize user privacy, which is why all our tools process files directly in your browser. While we don't have an SVG to PNG tool just yet, the simple, secure process is a core part of our design philosophy. For example, tasks like converting between common raster formats using our JPG to PNG tool happen locally on your machine, ensuring your data remains yours.
Generic Steps for an Online Converter:
- Navigate to a reputable online SVG to PNG converter.
- Upload your
.svgfile. - Look for options to set the output dimensions (width/height) or a scale multiplier (e.g., 2x).
- Choose a background option (transparent is usually best).
- Initiate the conversion and download your new
.pngfile.
Method 2: Using Professional Design Software
For full control over quality, dimensions, and optimization, using a vector editor is the recommended approach.
Adobe Illustrator
- Open your SVG file in Illustrator.
- Go to File > Export > Export for Screens... (the modern, preferred method).
- In the
Artboardstab, select the artboard containing your graphic. - Under
Formats, clickAdd Scaleand choose2x,3x, or4xto export high-resolution versions. You can also export at a specificWidthorHeight. - Ensure the format is set to
PNG. - Click the gear icon to access settings and confirm the
Background Coloris set toTransparent. - Click
Export Artboard.
Figma
- Select the frame, component, or group you wish to export.
- In the right-hand design panel, scroll down to the Export section and click the
+icon. - From the dropdown menu, select
PNG. - In the suffix box (which defaults to
1x), you can specify the export scale. Type2xfor double resolution,3xfor triple, etc. You can also specify an exact width like512w. - Ensure
Contents onlyis unchecked if you want the background, andInclude bounding boxis checked for proper spacing. - Click the
Exportbutton.
Inkscape (Free & Open-Source)
- Open your SVG in Inkscape.
- Go to File > Export PNG Image... (or use the shortcut
Ctrl+Shift+E). - An
Exportpanel will appear. At the top, choose what to export:Page,Drawing, orSelection. - In the
Image Sizesection, define the final pixel dimensions. This is the most crucial step for quality. Instead of changing the DPI, it's often more intuitive to set the finalWidthorHeightyou need. - Specify the filename and location under
Export As.... - Click the final
Exportbutton.
Best Practices for Crisp PNG Exports
Simply clicking 'export' isn't enough. To achieve those flawlessly crisp graphics, follow these essential best practices.
Rule #1: Export at 2x (or Higher) Resolution
This is the single most important secret to sharp web graphics. Modern devices, from smartphones to laptops, often have high-density displays (often called "Retina" displays). These screens pack twice (or even three times) the number of physical pixels into the same amount of space.
If you display a 100x100 pixel image on a 2x density screen, the screen has to stretch those pixels to fill a 200x200 physical pixel area, causing blurriness.
The Solution: Export your PNG at double the intended display size, then use HTML or CSS to constrain it back down.
- Example: If your logo needs to appear in a 150px by 50px space on your website, you should export the PNG at 300px by 100px.
- Implementation:
<img src="[email protected]" width="150" height="50" alt="Company Logo">
The browser will then take your high-resolution 300px image and beautifully downscale it to fit the 150px container, using all the extra pixel data to render sharp lines and text on any screen.
Rule #2: Always Use a Transparent Background
Unless you specifically need a colored background, always export your PNG with transparency. PNG's alpha channel transparency allows your logo or icon to sit perfectly on any website background—be it a solid color, a gradient, or a photo. This provides maximum flexibility and a much more professional look.
This principle of starting with a clean, flexible asset is crucial in all image editing. For instance, if you were working with a photograph and needed to isolate an object, you'd use a tool like a Background Remover to create a transparent PNG for layering. The same logic applies here: transparency equals versatility.
Rule #3: Optimize Your Final PNG
After exporting, your PNG file might be larger than necessary. Running it through a lossless compression tool can significantly reduce the file size without any visible loss in quality. This leads to faster page load times, which is great for both user experience and SEO.
Tools like TinyPNG, Squoosh, or ImageOptim can shave off kilobytes by stripping unnecessary metadata and optimizing the PNG's color palette. Optimizing assets is a critical part of web development, similar to how one might convert JPG to WebP to serve smaller, more efficient images to users. Don't skip this final step!
Rule #4: Align to the Pixel Grid
In your vector design software, make sure your shapes and lines are aligned to the pixel grid, especially for straight horizontal and vertical lines. This prevents the software from having to anti-alias (blur the edges) of a line that falls between pixels, which can result in a slightly fuzzy look even at high resolutions.
Common Pitfalls and How to Avoid Them
-
Problem: My exported PNG looks blurry or pixelated.
- Solution: You exported at 1x resolution. Go back and re-export at 2x or 3x the final size you intend to display it at on your website.
-
Problem: My PNG has a white box around it.
- Solution: You forgot to enable the transparent background option during export. Check the settings in your design software's export dialog.
-
Problem: The exported image is cropped strangely or has too much empty space.
- Solution: The artboard or canvas in your original SVG file is not properly sized to your artwork. Adjust the artboard to fit the graphic snugly before exporting.
-
Problem: The colors in the PNG look dull or different from my SVG.
- Solution: This is likely a color profile issue. Ensure your document's color profile is set to sRGB, which is the standard for the web. Check that your export settings are also configured to export in sRGB.
Conclusion: From Scalable Vector to Perfect Pixel
Understanding the relationship between SVG and PNG is fundamental to creating a visually stunning and high-performing website. While SVG remains the master format for creating and storing logos and icons, PNG is its essential, highly compatible counterpart for deployment.
By following the best practices outlined in this guide—especially the golden rule of exporting at 2x resolution—you can ensure your graphics are always delivered with the sharpness and clarity they deserve. You'll avoid the common pitfalls of pixelation and create a more professional and polished experience for your users, regardless of the device they're using.
Ready to tackle your other image conversion needs? Explore the full suite of free, private, and powerful image utilities at Practical Web Tools to handle all your daily tasks with ease.