Fever vs Sparks: Create Viral Caitlin Clark Reels for TikTok

The roar of the crowd, the squeak of sneakers on hardwood, and a logo three-pointer that sends social media into a frenzy. The Caitlin Clark effect is real, and nowhere is it more electric than during a matchup like the Indiana Fever vs. the L.A. Sparks. This isn't just a basketball game; it's a content goldmine. For creators, fans, and social media enthusiasts, every crossover, no-look pass, and clutch shot is a potential viral moment waiting to be clipped, edited, and shared.
If you've ever watched a game and thought, "That play needs to be on TikTok right now!", you're in the right place. You don't need expensive software or a powerful computer to create compelling WNBA highlight reels. This guide will walk you through the entire process of creating viral-ready highlight clips for TikTok, YouTube Shorts, and Instagram Reels using only free, privacy-focused online tools. Let's turn your fan passion into high-engagement content.
The Caitlin Clark Effect: Why WNBA Highlights are Dominating Social Media
It's impossible to ignore the seismic shift in sports media viewership, and Caitlin Clark is at the epicenter. Her transition from college basketball phenom to WNBA superstar has brought an unprecedented number of eyes to the league. This surge in popularity translates directly to social media engagement.
- Massive Search Volume: Terms like "Caitlin Clark highlights," "Fever vs Sparks," and "WNBA clips" are exploding on search engines and social platforms.
- Untapped Niche: While major sports networks create their own highlights, there's a huge appetite for fan-made content that offers a unique perspective, creative edits, and quick turnaround times.
- Algorithm-Friendly Content: Short, action-packed video clips are exactly what algorithms on platforms like TikTok and Instagram are designed to promote. A well-edited highlight reel has a high probability of landing on the "For You" page of millions.
By creating these clips, you're not just sharing a basketball play; you're joining a global conversation and building a community around one of the most exciting eras in sports history.
A Quick Word on Copyright and Fair Use
Before we dive into the creative process, it's crucial to address the legal side. Broadcasting rights for WNBA games are owned by networks (like ESPN, ABC, etc.) and the league itself. Grabbing and re-uploading entire game segments is a copyright violation.
However, content creation often falls under the principle of "Fair Use," especially for commentary, criticism, or news reporting. To stay on the safer side:
- Transform the Content: Don't just re-upload a raw clip. Add your own commentary (text-on-screen or voiceover), edits, music, and effects. Make it transformative.
- Keep it Short: Use only the briefest clips necessary to make your point.
- Give Credit: Always mention the source (e.g., "Credit: ESPN/WNBA") in your description or on the video itself.
- Check Platform Policies: Familiarize yourself with the copyright policies of TikTok, YouTube, and Instagram.
This guide is for educational purposes, and you are responsible for the content you create and publish.
Your Step-by-Step Guide to Creating Viral Highlight Reels
Ready to get started? We've broken down the process into five manageable steps. You can do all of this from your web browser without downloading any complex software.
Step 1: Finding and Sourcing Your Clips
The foundation of any great highlight reel is high-quality source material. You need crisp, clear video to work with. Here are a few places to look:
- Official Social Media: The WNBA, Indiana Fever, and L.A. Sparks official accounts on X (formerly Twitter), Instagram, and YouTube often post high-quality clips and replays.
- YouTube: Many sports channels and news outlets upload game highlights. You can use online tools to download snippets from YouTube videos for your edits.
- Fan Communities & Archives: Sometimes, fan groups or media archivists compile clips from games. These are often shared in bulk and packaged in compressed files to save space. You might download a file named
Fever-Sparks-Q3-Highlights.ziporClark_Assists.7z.
If you download a compressed archive, you'll need to extract the video files before you can edit them. This is where a simple online tool comes in handy.
How to Handle Compressed Files:
- Download the archived file to your computer.
- Navigate to a free online tool like Practical Web Tools' Decompress Files utility.
- Upload your
.zip,.7z, or.rarfile. - The tool will extract the contents, allowing you to download the individual video files (usually in
.mp4or.movformat).
This is a crucial first step that many beginner creators get stuck on. With the right tool, it's effortless.
Step 2: Trimming the Fat - Isolating the Perfect Moment
No one wants to watch 30 seconds of setup for a 3-second play. Your next task is to trim your source video down to the absolute best part. A great highlight clip is typically between 3 and 10 seconds long.
Using a free online video trimmer:
- Upload Your Clip: Open a web-based video trimmer and upload one of the
.mp4files you sourced. - Select the Action: Use the timeline sliders to select the start and end points of the action. Isolate the crossover, the shot, and the immediate reaction. Be ruthless—cut everything else.
- Preview: Play the trimmed selection to ensure it's a smooth, impactful clip.
- Export: Save the trimmed clip to your computer. Repeat this process for every key moment you want to include in your reel.
Step 3: Merging Clips to Tell a Story
Now you have a folder of short, punchy clips. It's time to stitch them together to create a narrative. You could show a sequence of three-pointers, a series of incredible assists, or a back-and-forth scoring battle between two players.
Using a free online video merger:
- Upload Your Trimmed Clips: Open a web-based video merger and upload the clips you created in Step 2.
- Arrange the Order: Drag and drop the clips into the sequence you want. Think about the flow. Do you want to build suspense? Start with the best clip first? The storytelling is up to you.
- Add Transitions (Optional): Some tools allow you to add simple transitions like fades or cuts between clips. A simple, clean cut is often the most effective for fast-paced sports highlights.
- Export the Final Reel: Merge the clips and download the final combined video file.
Step 4: Optimizing for TikTok, Shorts, and Reels
Before you post, you need to make sure your video is formatted correctly for vertical-screen mobile viewing. The wrong aspect ratio can ruin an otherwise great video.
Key Optimization Specs:
| Platform | Aspect Ratio | Resolution (Recommended) | Format |
|---|---|---|---|
| TikTok | 9:16 | 1080x1920 | MP4 |
| YouTube Shorts | 9:16 | 1080x1920 | MP4 |
| Instagram Reels | 9:16 | 1080x1920 | MP4 |
Most online video editors have a feature to change the aspect ratio. When you upload your merged video, look for a "Format," "Canvas," or "Aspect Ratio" button and select 9:16. This will crop your video to the vertical format. You may need to adjust the position of the video within the frame to keep the action centered.
Step 5: Managing and Archiving Your Growing Clip Library
As you create more content, you'll quickly accumulate dozens or even hundreds of video files. Raw, high-quality video takes up a lot of storage space. Efficiently managing these files is key to a sustainable workflow.
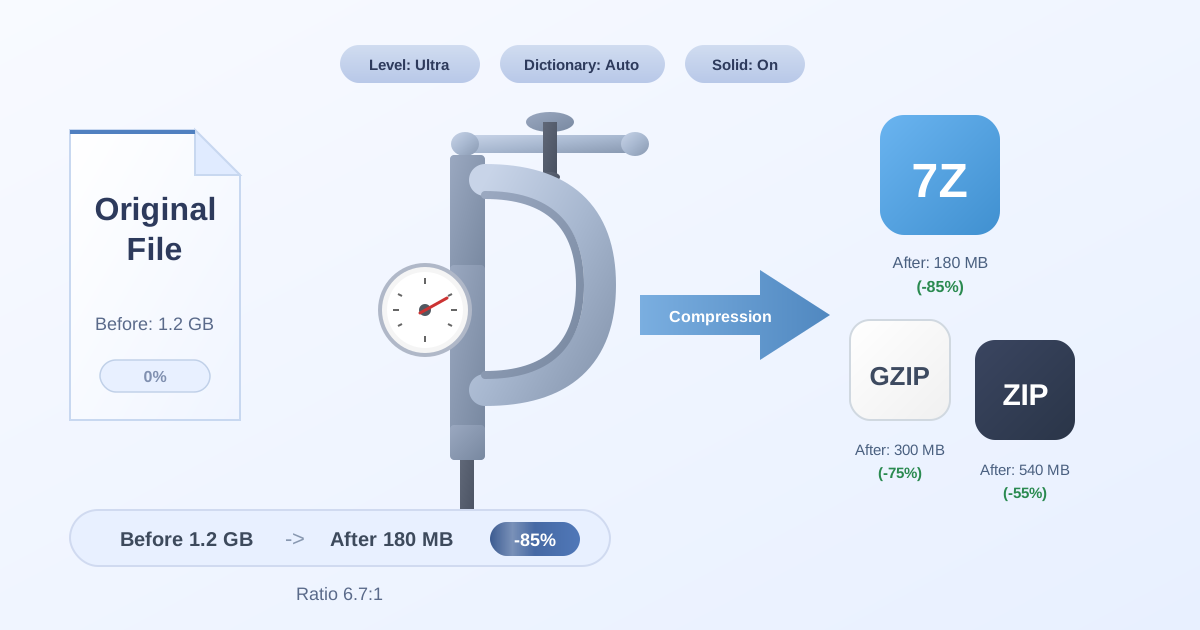
Compressing for Storage: Once a project is finished, you can take all the raw clips, trimmed clips, and final versions and compress them into a single archive file. This makes them easier to store and keeps your projects organized.
- Place all project files into a single folder on your computer.
- Go to an online tool like the Compress Files utility.
- Upload the entire folder.
- The tool will create a single
.zipfile that is significantly smaller than the sum of the individual files, saving you valuable disk space.
Standardizing Archive Formats:
You might download clips in a .7z archive but prefer to use .zip for better compatibility with your operating system. Or perhaps a collaborator uses a Mac and sends you a .tar file. Instead of downloading different software for each format, you can use a simple online converter. For instance, if you need to convert a 7Z file your friend sent, you can use a free 7Z to ZIP converter to instantly get it into your preferred format. This keeps your digital workspace tidy and consistent.
Pro Tips for Making Your Highlight Reel Go Viral
Creating the video is only half the battle. How you package and post it makes all the difference.
- Use Trending Audio: Don't just use the game audio. Scroll through TikTok or Reels to find a trending song or sound that fits the energy of your clip. Using trending audio dramatically increases your video's reach.
- Add Engaging Text Overlays: Use bold, simple text to add context. A hook in the first 2 seconds is crucial. Try things like: "Caitlin Clark's most SAVAGE play last night" or "You won't believe this pass."
- Master Your Hashtags: Use a mix of broad and specific hashtags to maximize visibility. For a Fever vs. Sparks clip, you could use:
#wnba,#caitlinclark,#indianafever,#lasparks,#womensbasketball,#basketballhighlights,#sportstiktok. - Write a Compelling Caption: Ask a question to encourage comments (e.g., "Is this the best pass of the season?"). Comments are a key engagement metric for the algorithm.
- Post at the Right Time: Post when your target audience is most active. This is often in the evenings or on weekends, but you can check your platform's analytics for data specific to your followers.
Conclusion: You're Ready to Create
The WNBA, powered by stars like Caitlin Clark, is creating unforgettable moments every game night. Now you have the blueprint to capture that magic and share it with the world. By leveraging free, powerful, and private online tools, you can easily create professional-looking highlight reels that have the potential to go viral.
From sourcing clips and decompressing files to trimming, merging, and finally compressing your projects for storage, every step can be handled right in your browser. Don't just be a spectator—become a creator.
Ready to manage your files like a pro? Explore the full suite of free and secure file management tools at Practical Web Tools and start building your content empire today!